
(Affiliate disclosure: I may receive a commission if you purchase something through links in this post. As an Amazon Associate I earn from qualifying puchases. See more details here:)

If you're not used to baking homemade bread, making sourdough bread might sound a bit intimidating at first, but once you get used to it, this bread is really much easier than "regular" yeasted bread.
This easy homemade sourdough bread only needs to be kneaded once, and after that you can just put it in the same pan you're going to bake it in and let it rise overnight. Then, the next morning when it has risen, all you have to do is put it in the oven and you're done. You don't have to worry about letting it rise more than once or shaping it or anything like that because it is a simple sandwich-style loaf that doesn't require much hands-on time or effort.
This sourdough bread recipe is also easier because sourdough yeast is much more flexible as far as time is concerned than store bought yeast is. You don't have to watch it as closely to monitor the rising time. Rather than planning your time around being there to check the dough and knead, and let it rise and knead again, etc. all you have to do is prepare the dough the day before and let it rise overnight. And if you're really busy and it rises a little bit longer than you had planned, it's not a big deal, and most of the time the bread will still turn out perfectly fine even if the dough is a bit over-risen.
Basic Information About Sourdough Baking
First things first, this bread recipe calls for homemade yeast. There were different variations of homemade yeast back in the 1800s when the recipe was written, but I chose to use a sourdough starter for my homemade yeast since I think it's the simplest to use and to maintain. In order to make this recipe, you'll need an established sourdough starter.
If you've never used a sourdough starter before, you can find out more about how to begin and maintain one in these posts:
- How to Make Homemade Yeast
- Tips for Using and Maintaining a Sourdough Starter ~ Part 1
- Tips for Using and Maintaining a Sourdough Starter ~ Part 2
- How Often Should You Feed A Sourdough Starter?
An Old-Fashioned Sourdough Bread Recipe
Once you've got your sourdough starter established, it's time to move on to the actual bread-making itself. This recipe is adapted from one that I found in an old recipe pamphlet called Mrs. Winslow's Domestic Receipt Book for 1869.
Note: Mrs. Winslow's Domestic Receipt Book was a recipe pamphlet designed to advertise Mrs. Winslow's Soothing Syrup for babies - a syrup that actually contained morphine as it's main ingredient and was sadly associated with infant deaths during this time period. The use of morphine was common in patent medications of the time, and it was also unfortunately quite common for those taking patent medications to have little or no knowledge of the ingredients that those "medicines" contained. Many mothers would have given this syrup to their babies without having any idea that it could end up being addictive or even fatal.
There are many good recipes in the Mrs. Winslow's Domestic Receipt Books including this one and they were most likely collected from bakers who had no knowledge of the potential harms of the soothing syrup. Because of that fact, I am leaving this recipe up for those who would like to make it. I will be looking in the future, though, to see if there are any other 19th century bread recipes that are close to this one that don't have the same associations with such a sad and controversial history. If I find one, I will add an update here.
The way that I make this bread isn't really quite the same as the original recipe because the original recipe just mentions "yeast" and doesn't specifically say sourdough yeast. There were several different types of homemade yeast that people used back in this time period, so I don't know exactly what type of yeast the recipe is designed to use. I also lately have been making this with a bit of sugar instead of molasses for a more neutral tasting bread. The molasses works well and tastes good, too, though, so it's really a matter of personal preference which one you want to use. I also omit the baking soda because I want the full sourdough, and adding baking soda would alter the sourdough process.
Original Recipe
“One coffee-cup flour; two coffee-cups Graham flour, one coffee cup warm water, half coffee cup yeast, a little molasses, a teaspoon of salt, half teaspoon soda dissolved in the water. Make as stiff as it can be stirred with a spoon. Let it rise over night, and bake about an hour in a moderate oven. This quantity makes one loaf.”
~ Mrs. Winslow’s Domestic Receipt Book for 1869 ~ Pg. 4
Important Notes About This Recipe
Any type of wheat flour should work fine for this recipe. Historically, this bread might have been made with whole wheat flour or with a more refined flour, depending on the economic status of the household and whether the bread was for company, etc. (Refined flour would have been more expensive.) You can also use an older, heirloom flour like spelt or einkorn. Einkorn flour is the one that I've been using the most of lately to make my bread. (If you use einkorn flour, you can reduce the amount of water by a small amount.)
The length of time the bread needs to rise may vary depending on the time of year and the temperature in your home. In warmer weather, it will take less time to rise than it will in cooler weather. (Mine usually takes about 8-10 hours to rise in the summer and about 12-14 hours to rise in the winter.)
Having cooler water in the summer can help to slow down the rising process a bit and using warmer water can help to speed up the process in the winter if you are concerned about the bread rising too quickly in the warm weather or not quickly enough in cold weather.
True, authentic sourdough bread is usually made without the addition of baking soda. Many 19th century recipes call for the use of baking soda in yeasted breads and baked goods, though, as a way to neutralize the sour flavor and create a sweeter taste. Some sourdough starter strains are stronger than others, so depending on the region in which you live and on your individual preference, you can add or omit the baking soda as you choose.

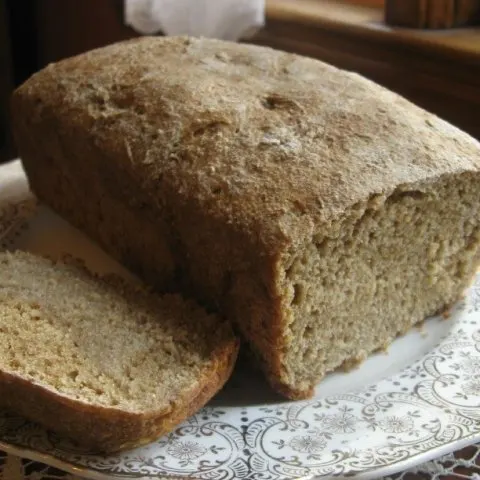
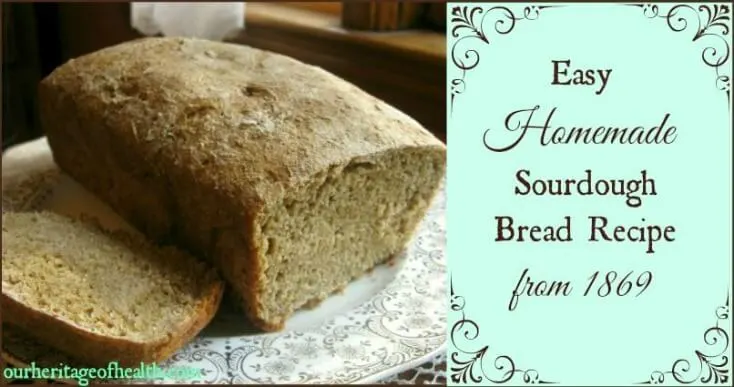
Easy Homemade Sourdough Bread Recipe from 1869
This homemade sourdough bread recipe is based on an old-fashioned 19th century bread recipe, and it is a very easy recipe to make. You only have to knead the bread lightly once and the timing for letting it rise is more flexible than with yeasted bread recipes. This recipe is adapted from Mrs. Winslow's Domestic Receipt Book for 1869.
Ingredients
- 3 cups flour (You any use type of wheat, spelt, or einkorn flour for this recipe)
- 1 cup water
- ½ cup sourdough starter
- 2 Tbs molasses (or sugar)
- 1 teaspoon salt
- (Optional) ½ teaspoon baking soda
Instructions
- In a large mixing bowl, combine flour and salt, stirring until combined.
- Add sourdough starter, molasses (or sugar), and water, stirring until combined. Unlike other bread recipes, the dough for this bread will feel wet and sticky rather than dry.
- (Optional: If you do not want any sour flavor or tang in your finished loaf, add the ½ tsp. of baking soda and mix until well combined. Be aware, though, that the bread will not be true sourdough bread with the addition of the baking soda.)
- Knead the wet dough for a minute or two. This part will be messy. I usually just keep the dough in the bowl to knead it to avoid extra mess on the counter. This type of bread doesn't need to be kneaded as thoroughly as other bread recipes.
- Place dough into a greased 9x5 inch bread pan. Cover with a damp dish cloth or tea towel, with another dry towel over it and let rise for about 8-14 hours, or until fully risen. You want the dish towel touching the bread to stay damp because that will help to prevent the top of the dough from drying out and forming a crust, which could prevent the dough from rising as much. (I find it convenient to prepare my bread dough in the evening and then bake it the next morning.)
- Once it has risen, the dough should be light and fluffy and form an indentation when you press your finger into it. (If you have a glass bread pan, you can see little bubbles in the dough through the sides and bottom of the pan.)
- Bake at 350 degrees for about 45-50 minutes or until bread is golden brown and sounds hollow when you tap on it.
Notes


(Lori Elliott is a participant in the Amazon Services LLC Associates Program, an affiliate advertising program designed to provide a means for us to earn fees by linking to Amazon.com and affiliated sites.)
The information in this post is not to be taken as medical advice and is not intended to diagnose or treat any disease.
Cynthia
Saturday 3rd of May 2025
Can this be made in a small round Dutch oven (cast iron)? Lid off? Adjust temperature? And also have you made it with AP or bread flour? Thank you kindly!
Cynthia
Friday 9th of May 2025
@Lori Elliott, Thank you so much for your input! I really appreciate it!
Lori Elliott
Monday 5th of May 2025
I've never tried it in a Dutch oven before, but it's possible that it might work. I've only ever made this recipe in a loaf pan, so I'm not sure how it would do in a round Dutch oven as far as how well it would rise. I'm guessing the dough might spread out more and end up as a flatter bread unless your Dutch oven is quite small. And I'm afraid I don't know about whether the temperature would need to be adjusted or whether it would better with the lid on or off. I've never baked bread in a Dutch oven, so I'm sorry, but I'm not able to be much help with that. I do usually use AP flour for making this recipe, though.
Jay Sun
Friday 7th of June 2024
I need help please. My bread is not rising. I followed your instructions on his to make the starter, and it looks good. I followed the recipe to a “t”. Please advise.
Lori Elliott
Friday 7th of June 2024
I'm sorry to hear that your bread isn't rising! It's hard to say exactly what could be causing this issue, but here are a few possibilities to check out: 1) After you feed your starter does it visibly rise higher and have lots of little bubbles in it? It's possible that your starter isn't quite active enough yet, especially if it's a newer starter. The first time I tried making a sourdough starter I thought it was ready to bake with and I ended up with bread that didn't rise very much, but after feeding the starter consistently for a few more days it got more established and my second attempt at making bread rose better. 2) Is it cold in your house where you have the bread rising? I've found that it takes much longer for my bread to rise when it is cold (often more than 16 hours to rise enough to bake when the house is in the low 60s.) So it's possible that it just needs a bit longer to rise or you could try to move it to a warmer place to rise. 3) Did you use tap water to mix up your bread dough? I've heard some people say that the chlorine that's often added to tap water can kill off some of the yeast in the starter and affect the bread's ability to rise.
Ina
Friday 2nd of December 2022
Hello all, this recipe is my go to. I want to know if this recipe can be tweaked to bake in a dutch oven?
Lori Elliott
Friday 2nd of December 2022
I've never tried it personally since I don't have a dutch oven at the moment, but I would think it would probably work. You might have to experiment a bit with baking time, and possibly double the recipe ingredient amounts, depending on how large your dutch oven is. I'd certainly be curious to know how it turns out!
Joy Roxborough
Sunday 24th of July 2022
Does this bread end up sticking to the pan if u let it rise in same pan you bake it in?
Lori Elliott
Monday 25th of July 2022
I've found that as long as I grease the pan before putting the dough in then it doesn't usually stick. The only time that I find that it sticks to the pan is if I let it rise too high where it starts to overflow the pan. Otherwise, as long as I grease the pan well, it doesn't stick for me.
Lee
Thursday 28th of April 2022
I made my 1st loaf of this recipe. It taste great, but it is not as fluffy or did not rise to high as I would have hoped for, but I do like the crispy crust and the chewy texture. I did not include the baking soda. I wonder if it would have had a better rise if I would have included the soda. Has anyone tried it with the baking soda? Mine was not rising at all at 1st, even into the night it was not doing much, but it was not the warmest in the house being spring time here. So at night I placed it on top of my radiator heater with the heat on low, and it did start to increase in size after that. I made sure it was not getting too hot, but think I got cold in the night and turned the heat up just a smidgen. I think I may have partialy cooked it on the heater because the crust on top would crack just a little bit when touched after I got up in the morning...not spring back like dough does before you bake it. Maybe this is the reason it didn't rise much? It only raised 2 1/2" at the highest point in the middle.
Penny
Wednesday 27th of May 2026
@Lee, Mine has been rising for several days now without much change. I think it's risen slightly since I panned it. I have made other sourdough recipes that have a lot more steps, however, I've gotten consistent results with them. Also, the wheat flour may affect the rising since it's heavier. I would not make again but worth a try, I guess.
Michele
Tuesday 2nd of January 2024
@Lee, I recently made a couple loaves of bread and FORGOT to put in the salt. Guess what? Two and a half inches high at the MOST.
Lori Elliott
Friday 29th of April 2022
If your bread didn't rise much, my guess would be that the sourdough starter might not have been active enough. If a sourdough starter hasn't been fed recently and isn't bubbly then it won't do a very good job of working as a leavening agent for the bread dough. If you were using an established starter that has worked well with other things in the past, though, then the temperature could have been part of the problem. The crust you mentioned on the top could also have been part of the issue, too, because if there was a hardened crust then that could have prevented it from rising more. Covering your bread while it is rising could help to keep the top part from drying out and forming a crust. I've made this recipe both with and without the baking soda, and I haven't personally found that the baking soda makes a significant difference. It might increase the rise by a little, but my bread still rises ok without it. I hope you can figure out what was causing the issue and have better success in the future!